Designing E-Learning 3.0 in gRSShopper - 3
E-Learning 3.0 - Part 1 - Part 2 - Part 3 - Part 4 - Part 5 - Part 6 - Part 7 - Part 8 - Part 9 - Part 10 - Part 11 - Part 12 - Part 13
I have the basic structure of the course in place and now I want to fill it out with some content. The course starts in a couple of days and it's important to ensure people have something to see and work with. I'll continue to develop the software as needed as I develop the course.
Content
True, the content isn't the course; it's the thing that attracts people to the course and gives them a starting point for their own activities to interact and revolve around. It is also, though, a statement of what I, as the course author, thinks is worth exploring, what I think about it, and how I plan to work through it.
The background reading I did for this course looked not only at new e-learning trends but also advances in artificial intelligence and analytics, cloud hosting systems and server virtualization, as well as blockchain and related distributed ledger technologies. From this I created a set of nine topics that constituted the structure of the course - the course modules.
Then, for each module, I considered the topic from four distinct perspectives: philosophy, technology, media and learning. This was essential in order to ensure that the course was more than just a technology course, to give non-technical people a place in the course, and to build on and reflect on the wider implications of the work.
Then I took a few days and wrote a synopsis based on that structure. This synopsis will be used for a variety of purposes: it creates the content for each module, it defines the sort of tasks and activities we can engage in, it creates the outline for my introductory E-Learning 3.0 talk, it creates the base material for a series of articles on E-Learning 3.0, and it creates the structure for an academic paper on E-Learning 3.0 (some of the individual modules might also become papers).
Then it came time to enter the content into the course. In doing this I realized that I needed to change how I had defined to Module table in gRSShopper. The synopses are each at least five paragraphs (one for each perspective, plus a wrap-up, which I then subdivided into smaller paragraphs for easier reading - big blocks of text are not recommended online). So I need to add a 'synopsis' field to the 'Module' table, put the longer synopses in these, and use the 'description' field for a short outline (probably the first paragraph of the synopsis).
First, I added a new text field to the table (clicked on 'list Forms', selected 'Module', select the 'Table' tab, added the field). Doing this I realized that I'm still getting a 'Command show_columns not recognized.' response from gRSShopper when I try to reload the table after updating it, so this is something I need to fix.
Next, I need to add the synopsis field to the form, so I click on the 'Edit' tab and add the following line right under the 'description' line:
synopsis,wysihtml5,40x20;
I also changed 'description' to 40x10 to make it a smaller field. The size of the field is used to indicate expectation (I expect the description to be short, the synopsis long) but it doesn't actually restrict the number of characters I can enter. My 'Module' form now looks like this:
 |
| Figure 27 - Module Editing Form with Synopsis - first attempt. |
Well that's not right. The 'synopsis' field should be a WYSIWYG field, just like description. This could be caused by a spelling mistake, but I checked that, and it appears OK. So I have to figure out the problem.
I tested it. It wasn't saving either. Used 'Inspect Element' and discovered a leading space before 'synopsis'. I need to make sure the form editor removes leading spaces (in this, actually, a trailing space from the previous line). Now it saves. But it still doesn't display correctly.
I tried making 'description' a plain text box, which worked, but did nothing to change the way 'synopsis' is displayed.
OK, after messing around with the code, realized I should have used this:
synopsis,html,40x20;
*sigh*
Here's my form now:
 |
| Figure 28 - Module Editing Form with Synopsis - second attempt. |
OK, now that I've entered all the synopsis data into the forms I can set up the views. I'll create a view called module_html to show the whole module, and module_outline, to use for the course outline. Here they are:
 |
| Figure 29 - module_html view |
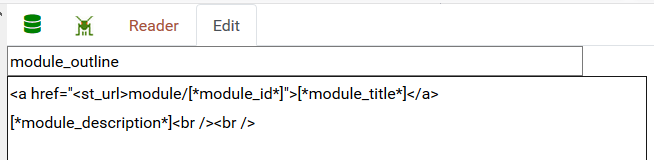 | ||
| Figure 30 - module_outline view |
Now I'll set up the course outline page.
 |
| Figure 31 - Course Outline page |
It's still a bit primitive. It has the out-of-the-box gRSShopper template and contents. So I need to edit the page_header template to use the course mascot image, and then to create a contents box (I could just put it in the template but I want to be able to reuse it wherever I want).
Here's the page_header template:


 |
| Figure 32 - Page Header Template |
I kept external file loads to a minimum, using only the gRSShopper basic style sheet and three google fonts for the headers, as well as the course mascot image. The table-list CSS is for the contents box and probably belongs there, but I put it here.
The gRSShopper basic style sheet is based on Simple Responsive Template v 1.2by www.prowebdesign.ro with minor modifications. It defines a responsive grid framework that I quite like and have used on my main website for a number of years. So the site will be (mostly) quite readible on mobile devices as well as in a browser on a desktop or laptop. You can see the "grid_9" class defining the beginning of the main content colum (9/12ths of the page wide).
The page footer template closes the main content column and adds the contents box. Here is it:

 |
| Figure 33 - Page Footer Template |
This template closes the 9/12ths column and opens a 3/12ths colum for the sidebar. Inside this I place the box, using a box command (
The footer includes Creative Commons information, the publication year (set by
Now for the contents. This is a nice list on the right hand side. I wanted to automatically generate the list of modules, and add one or two selected pages to that list. Here's how I did it:
 |
| Figure 34: Course Contents Box |
I used standard list notation (ul and li) using the CSS classes I defined in the page_header template. And I used a gRSShopper keyword command to list all the course modules, sorted by their module number. I wanted the moduke titles to print out in white, so I specified a keyword format of 'contents' and defined this in a new view for modules, module_contents. Here it is:
 |
| Figure 35: module_contents View |
This view places the content from the module table into the output; here I use [*module_id*] to specify the page where the module can be viewed, and [*module_title*] for the title. otice again the use of
Something to note: if I change this view later, I need to republish all my pages. In order to make the website more efficient, I don't generate the pages each time they are viewed (I can do this, but there's no reason to do this). So people see the page at it's URL instead of as defined by gRSShopper.
Si9nce I'm working on the page, I do that now, going to the 'Page' table in the page editor, entering the page URL, and clicking on 'Publish'.
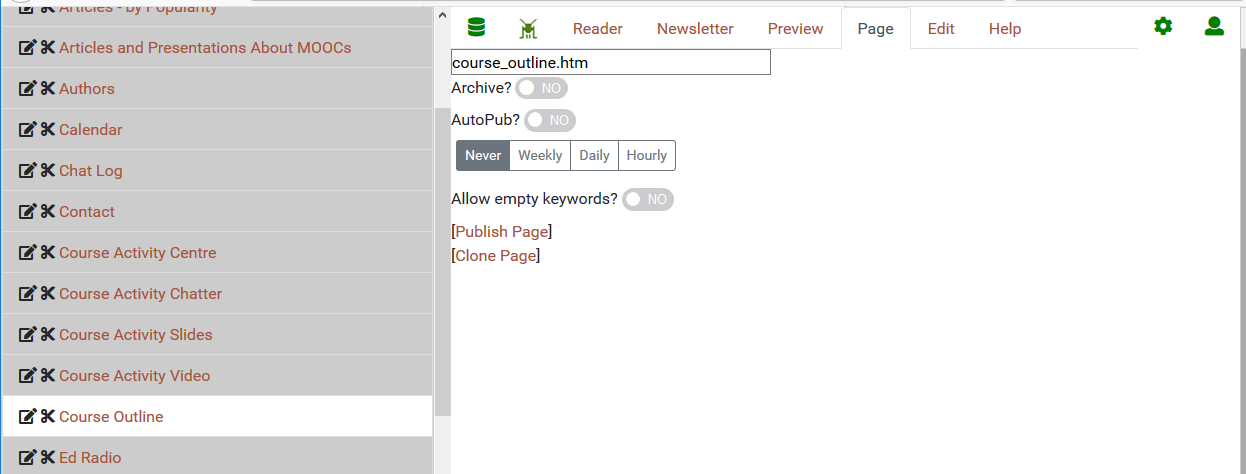 |
| Figure 36: Page Editor Page Tab |
So that completeds my Outline Page, and here's what it looks like:
 |
| Figure 37 - Outline Page |
Right now the modules are pretty ugly; it defaults to a default view, which simply lists the title of the module. But I want them to be nice, and I want to include associated elements, like activities and resources.
Since I've done all the work, this is very quick to do. But I have to be sneaky.
First, I copy the page_header template into a new box that I title course_header. I also copy the page_footer template into a new course_footer box. I'd display them, but they're exactly the same as the template.
Next, I create a new html view for modules (called module_html). Here it is:
 |
| Figure 38 - module_html View |
I use the box command to put the course_header and course_footer boxes at the top and bottom of the page. I use [*module_title*] and some formatting to create a nice title. I insert the [*module_description*] and then use the keylist command to list all the events associated with this module. Then I insert the [*module_synopsis*] I created earlier, and prepare a resources section (I will come back and define another keylist command for these when I'm ready). I'm also thinking of adding badges, tasks, and other things to each module.
The keylist command for activities will create a link to each event. They are displayed here using the list format; maybe I'll change that, maybe I won't.
So that's my module page. Here's what they look like:
 |
| Figure 39 - Module Page |
One more note before I go.
The data pages - like a module page, or an event page - actually are generated dynamically. Normally the URL is:
Which is rewritten by .htaccess to the actual (and clunkier) gRSShopper URL
However, I don't like rebuilding all those boxes and keywords and keylists every time - it's too much for an inexpensive web server (which is all I can afford), so when the page is displayed, it creates a copy of the page at the actual
So when someone accesses the page, the page.cgi script first looks for the cache version; if it exists, it serves the cache version, otherwise, it rebuilds the page. Result: a much lighter server load.
However, what I haven't done yet is to write a script to remove or update the cache version when I make a change affecting one of the pages. So sometimes people only see the old version of the page. This is especially annoying when I'm developing the page and want to see the new version.
So I created a 'force' command which updates the cache version:
I use this when I'm developing and want to refresh the page a lot. But what I need to do is build it right into the editor (and especially 'Page Preview') and remove it from general use. But for now, that's how I'm doing it.
That's all for the pages. Now I need to finish creating and adding events.
%20LinkedIn.png)
Comments
Post a Comment
Your comments will be moderated. Sorry, but it's not a nice world out there.