How to Use Fastpages
This is a really interesting project that allows you to write posts in markdown, MS Word or Jupyter notebooks and publish them in a blog using GitHub pages. No website needed!

But the instructions are far from clear, so here's a step-by-step version.
Yes, there's more! Go to Part Two.
But the instructions are far from clear, so here's a step-by-step version.
- Login to GitHub. If you don't have a GitHub account, register for one, then login to it
- Click this link: https://github.com/fastai/fastpages/generate
This gives you an option to create a new repository in your own GitHub account. My account is called 'Downes' and I just called the new repository 'fastpages'.
- Wait a minute or so. Then reload your repository page. This will review a new automatically created pull request. You can see it here:

- Click on 'Pull Requests'

- Click on 'Initial Setup'. This will show you some instructions.

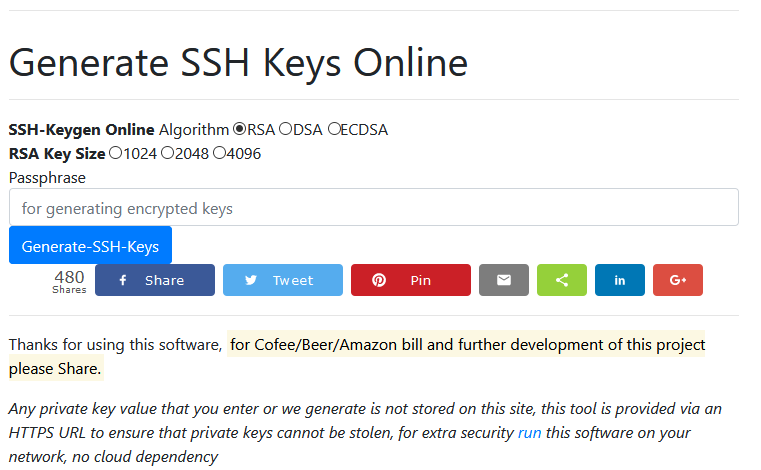
- Create an SSH Key Pair. Click on this link: https://8gwifi.org/sshfunctions.jsp (there's a popup advertisement you should just dismiss to get to this screen):Select:

RSAand4096and leavePassphraseblank. Click the blue buttonGenerate-SSH-Keys. The screen will display a public key and a private key.
- Create a Secret. Click on the link in the instructions: This link is specific to your repository. For me, it's the following link:

https://github.com/Downes/fastpages/settings/secretsbut for you it will use your repository name.Click on 'Add a new Secret' and a text field will open up: Type
Type
SSH_DEPLOY_KEYinto the 'Name' field and paste the Private key from step 6 above into the 'Value' field (be sure to copy the entire public key; you will have so scroll as you copy).Then click the green 'Add secret' button.
- Add a Deploy Key. Click on the link in the instructions: Just like before, this link is specific to your repository. For me, it's the following link:

https://github.com/Downes/fastpages/settings/keysbut for you it will use your repository name.Click the 'Add deploy key' button. Paste your Public Key from step 6 into the
Keybox. In the Title, name the key anything you want, for examplefastpages-key. Finally, make sure you click the checkbox next to Allow write access (pictured below), and click Add key to save the key.Then click on 'Add Key'.
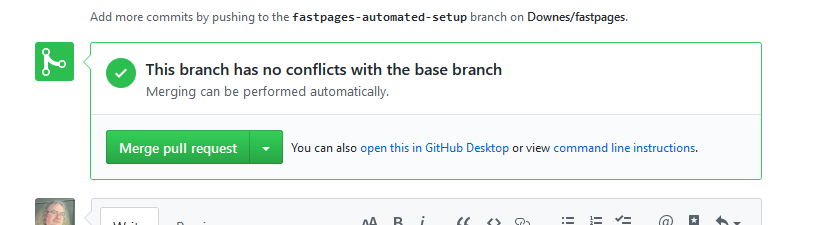
- Merge the Pull Request. Scroll down to the bottom of the 'Initial Setup' page (where the instructions are): Click on the green 'Merge pull request' button.

- Wait for a few minutes. GitHub Pages will automatically create your website, but it takes some time. This will happen every time you push new content to the master branch of your repository (more on that below). Note: when I installed Fastpages, there was a second pull request (
Bump nokogiri from 1.10.7 to 1.10.8) that had to be completed, in order to address a security vulnerability. If you get this, open the second pull request, scroll to the bottom, then click 'Merge Pull Request'.


Yes, there's more! Go to Part Two.
Comments
Post a Comment
Your comments will be moderated. Sorry, but it's not a nice world out there.