Setting Up a Node.js Application in Reclaim Cloud (1)
1. Create a new environment in reclaim cloud
I selected node.js as my application and Maria DB as my MySQL database.

2. Set up an end point for the node.js application
- click on 'Settings' for the environment

- select 'End Points' from the menu to the left

- Click 'Add'
- Enter any name you want, and '3000' for the port (note: this port number is defined in index.js, below).
- Click 'Add'. The system will select it's own 'public port', which is what you actually use to access the application. In my case, the end point was:
http://node11977-env-3877043.ca.reclaim.cloud:11008
In other words, it replaced port '3000' with port '11008'.
3. Generate an SSH Key Pair
The public key is like a lock.
The private key is the key that opens the lock. Never share it.
Download PuTTY gen Portable Executable to create the keys (for Windows): https://winscp.net/eng/downloads.php#putty_additional
Alternatively, In Mac, Linux or Windows Subsystem for Linux (WSL), to generate the keys use the following command:
ssh-keygen -t ed25519
If you decide to use WSL to generate the keys, find them using Explorer in Windows. Type the following in the address bar:
\\wsl$
and press enter. Resource: https://www.howtogeek.com/426749/how-to-access-your-linux-wsl-files-in-windows-10/
4. Access the node.js environment using SFTP
Resource: https://www.exavault.com/blog/import-ssh-keys-winscp
I use Win-SCP for FTP access
To load private key:
- select 'session' then 'new session'
- click on 'advanced'
- click on SSH: Authentication
- select 'private key file' (click on three dots to the right)
- select the private key created in the previous step
- click OK
To find the STFP address to load:
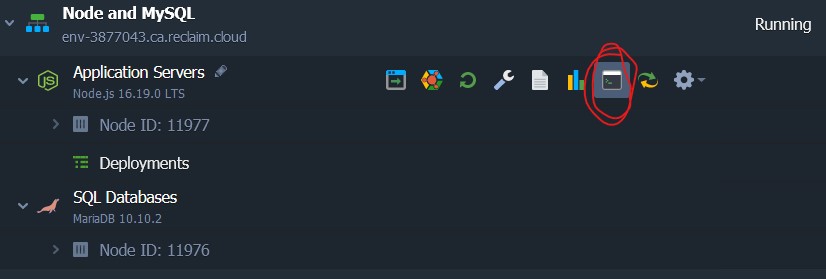
- go to the Reclaim Cloud environment and highlight the node.js server, then select 'settings' (the gear icon) and pick SFTP/Direct SSH Access

- get the address from the display

- enter that into the address field for WinSCP

and you should see the contents of the node.js server in the right hand window.
Some things to note:
The directory ROOT is the default node.js application created by the platform, but we don't need to use this (some guides recommend deleting it entirely).
5. Set up the database
- Go to phpMyAdmin in the cloud environment (the address will be in the email Reclaim sent you titled 'MariaDB Node Added to Your Reclaim Cloud Environment').
- Create a new database (which I called NodeMySQL) and then add tables (I'm using the tables suggested here: https://blog.logrocket.com/build-rest-api-node-express-mysql/ ). For example, paste and run the following commands in the SQL form:
CREATE TABLE `programming_languages`
(
  `id`            INT(11) NOT NULL auto_increment ,
  `name`          VARCHAR(255) NOT NULL ,
  `released_year` INT NOT NULL ,
  `githut_rank`   INT NULL ,
  `pypl_rank`     INT NULL ,
  `tiobe_rank`    INT NULL ,
  `created_at`    DATETIME NOT NULL DEFAULT CURRENT_TIMESTAMP ,
  `updated_at`    DATETIME on UPDATE CURRENT_TIMESTAMP NOT NULL DEFAULT CURRENT_TIMESTAMP ,
  PRIMARY KEY (`id`),
  UNIQUE `idx_name_unique` (`name`(255))
)
engine = innodb charset=utf8mb4 COLLATE utf8mb4_general_ci;
INSERT INTO programming_languages(id,name,released_year,githut_rank,pypl_rank,tiobe_rank)
VALUES
(1,'JavaScript',1995,1,3,7),
(2,'Python',1991,2,1,3),
(3,'Java',1995,3,2,2),
(4,'TypeScript',2012,7,10,42),
(5,'C#',2000,9,4,5),
(6,'PHP',1995,8,6,8),
(7,'C++',1985,5,5,4),
(8,'C',1972,10,5,1),
(9,'Ruby',1995,6,15,15),
(10,'R',1993,33,7,9),
(11,'Objective-C',1984,18,8,18),
(12,'Swift',2015,16,9,13),
(13,'Kotlin',2011,15,12,40),
(14,'Go',2009,4,13,14),
(15,'Rust',2010,14,16,26),
(16,'Scala',2004,11,17,34); Here's what it looks like in phpMyAdmin:

Click 'Go' to submit the command.
6. Set up our node.js application
- Open an SSH window into the node.js application
- in the SSH window, make a directory for the application and cd into it:
mkdir programming-languages-api && cd programming-languages-api
- install the application dependencies using npm
npm i express


- install the node mysql2 module, which is needed by the application below
npm i mysql2
- using a text editor (I use Visual Studio Code) in a clean directory, create an index.js file. I used the one recommended here: https://blog.logrocket.com/build-rest-api-node-express-mysql/
- using WinSCP (or your sftp client) upload index.js to the application directory (in this case, 'programming-languages-api').
- Start the node server in the SSH window:
node index.js
7. Set up the node REST environment
- create 'routes' and 'services' directory under the programming-languages-api directory
- create a config.js file for the database. The configuration information is found in the email from Reclaim titled 'MariaDB Node Added to Your Reclaim Cloud Environment'. Here's mine:
const config = {
db: {
/* don't expose password or any sensitive info, done only for demo */
host: "node11976-env-3877043.ca.reclaim.cloud",
user: "root",
password: "MVKvlz13312",
database: "NodeMSQL",
},
listPerPage: 10,
};
module.exports = config;
I also created other application finds, including helper.js, etc. from the instructions at https://blog.logrocket.com/build-rest-api-node-express-mysql/
These are straight from the LogRocket article (I'm including them in case the original article ever disappears):
helper.js
function getOffset(currentPage = 1, listPerPage) {
  return (currentPage - 1) * [listPerPage];
}

function emptyOrRows(rows) {
  if (!rows) {
    return [];
  }
  return rows;
}

module.exports = {
  getOffset,
  emptyOrRows
}
services/db.js
(connects to the server to execute the request)
const mysql = require('mysql2/promise');
const config = require('../config');

async function query(sql, params) {
  const connection = await mysql.createConnection(config.db);
  const [results, ] = await connection.execute(sql, params);

  return results;
}

module.exports = {
  query
}
services/programmingLanguages.js
(connects the request to the db function - note that in the orighinal article there is an error in the name of this function).
const db = require('./db');
const helper = require('../helper');
const config = require('../config');

async function getMultiple(page = 1){
  const offset = helper.getOffset(page, config.listPerPage);
  const rows = await db.query(
    `SELECT id, name, released_year, githut_rank, pypl_rank, tiobe_rank
    FROM programming_languages LIMIT ${offset},${config.listPerPage}`
  );
  const data = helper.emptyOrRows(rows);
  const meta = {page};

  return {
    data,
    meta
  }
}

module.exports = {
  getMultiple
}
routes/programmingLanguages.js
(connects the request to the function)
const express = require('express');
const router = express.Router();
const programmingLanguages = require('../services/programmingLanguages');

/* GET programming languages. */
router.get('/', async function(req, res, next) {
  try {
    res.json(await programmingLanguages.getMultiple(req.query.page));
  } catch (err) {
    console.error(`Error while getting programming languages `, err.message);
    next(err);
  }
});

module.exports = router;
index.js
(This is a rewritten version of the index.js file from above, and handles the incoming 'programming-languages' request)
const express = require("express");
const app = express();
const port = 3000;
const programmingLanguagesRouter = require("./routes/programmingLanguages");
app.use(express.json());
app.use(
  express.urlencoded({
    extended: true,
  })
);
app.get("/", (req, res) => {
  res.json({ message: "ok" });
});
app.use("/programming-languages", programmingLanguagesRouter);
/* Error handler middleware */
app.use((err, req, res, next) => {
  const statusCode = err.statusCode || 500;
  console.error(err.message, err.stack);
  res.status(statusCode).json({ message: err.message });
  return;
});
app.listen(port, () => {
  console.log(`Example app listening at http://localhost:${port}`);
});
This code now allows us to read the content from the database.
If the server is still running, stop it with ctl/C
Then start it again in the SSH window:
node index.js
I still need to do the C,U and D parts of my CRUD application, and also to figure out how to make it work as an https. But I'm pretty happy with where I ended up today.
%20LinkedIn.png)
Comments
Post a Comment
Your comments will be moderated. Sorry, but it's not a nice world out there.